When you are sewing the design the instructions may call for various types of stitches. The stitches demonstrated on this page are:
Continuing a sequence to fill a shape
Continuing a sequence around a shape
Continuing a sequence along a curve
Continuing a sequence along an ‘S’ curve
Backstitch
Where the design calls for backstitch this works as follows:

Out at 2 in at 1
Out at 3 in at 2
Out at 4 in at 3
Stem stitch

Out at 1 in at 3
Out at 2 in at 4
Out at 3 in at 5
Expert tip: You can make the start and end of the stem stitch neater by adding an extra stitch at each end, with a span of two holes instead of three. For example, in the above diagram you would start with “Out at 1 in at 2”, then follow the standard stem stitch sequence of “Out at 1 in at 3, Out at 2 in at 4”, etc.
Continuing a sequence
Some instructions will start a sewing sequence and then leave you to continue the sequence. For example:
Out at A in at B
Out at C in at D
Out at E in at F
Continue this sequence until the shape is complete.
These instructions have set up the direction of stitching and the number of holes between ‘out’ and ‘in’. Each new stitch emerges from the next hole along on the ‘out’ side and enters the next hole along on the ‘in’ side. There are the same number of pricked holes between the ‘out’ and ‘in’ on each stitch.
The diagrams below are animated gifs. If your computer is set to view animated gifs the stitches will be added one at a time.
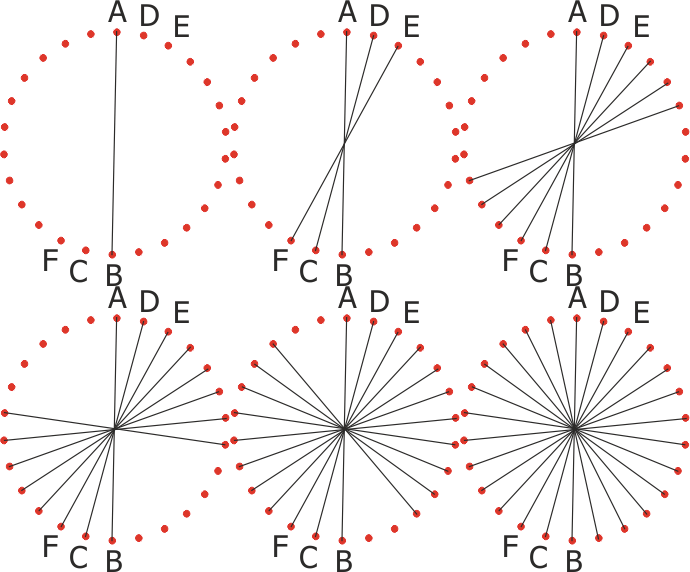
Continuing a sequence to fill a shape.
On the following animated diagram the first stitch of the sequence spans half the shape so each hole is used once.

Keep adding stitches until the shape is complete.
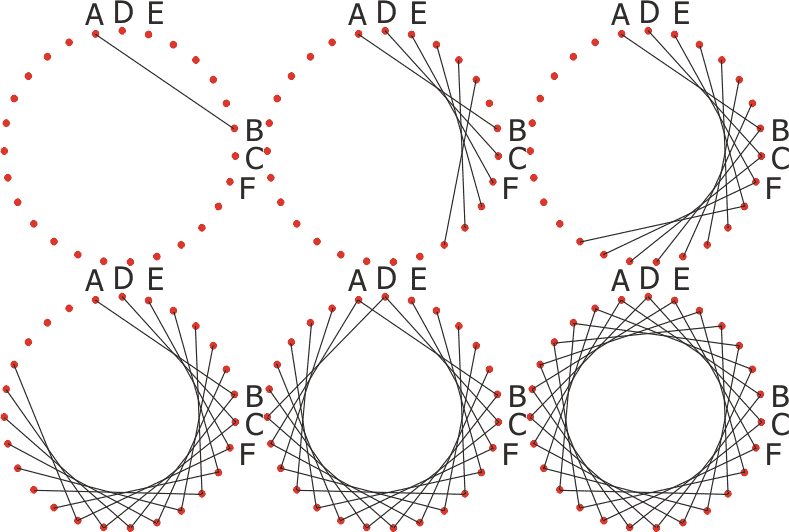
Continuing a sequence around a shape.
On the following animated diagram, the stitches span 8 holes including the out and in holes. The first few letters indicate the way the stitches are going. When you get to unlabeled holes keep the sequence going by moving forward by one hole at a time. Keep the stitch length to 8 holes. All the holes are used twice in this example.

Keep adding stitches until the shape is complete.
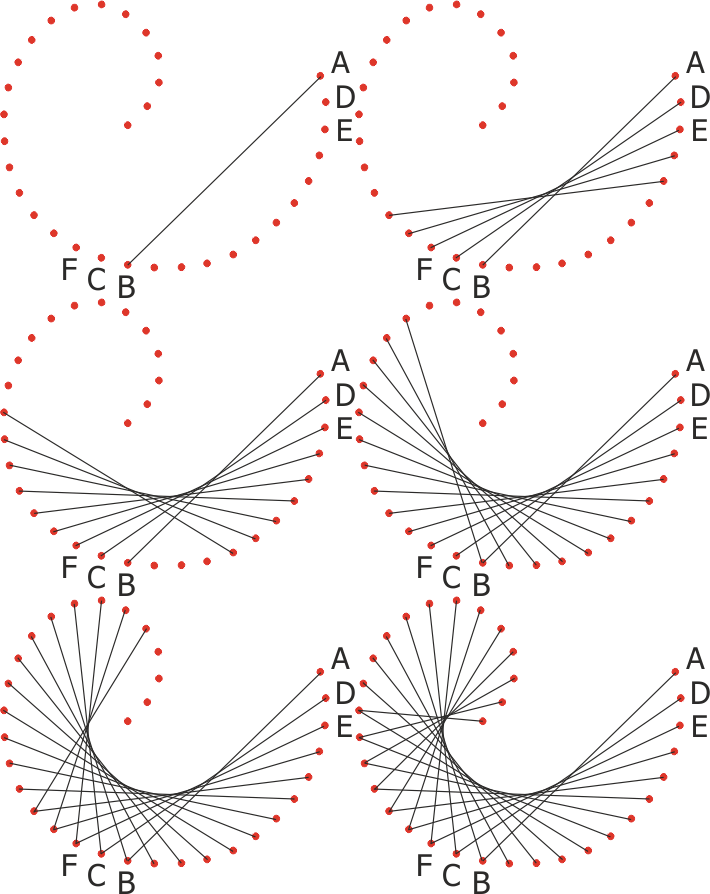
Continuing a sequence along a curve.
The following animated diagram is part of a bird shape. The first three stitches are labeled to set up the sequence. Continue the sequence moving forward one set of holes at a time. Keep the same number of holes between the hole you come out of and the hole you go in at. In this example all the stitches are 13 holes long. Some of the holes are used twice.

Keep adding stitches until the shape is complete.
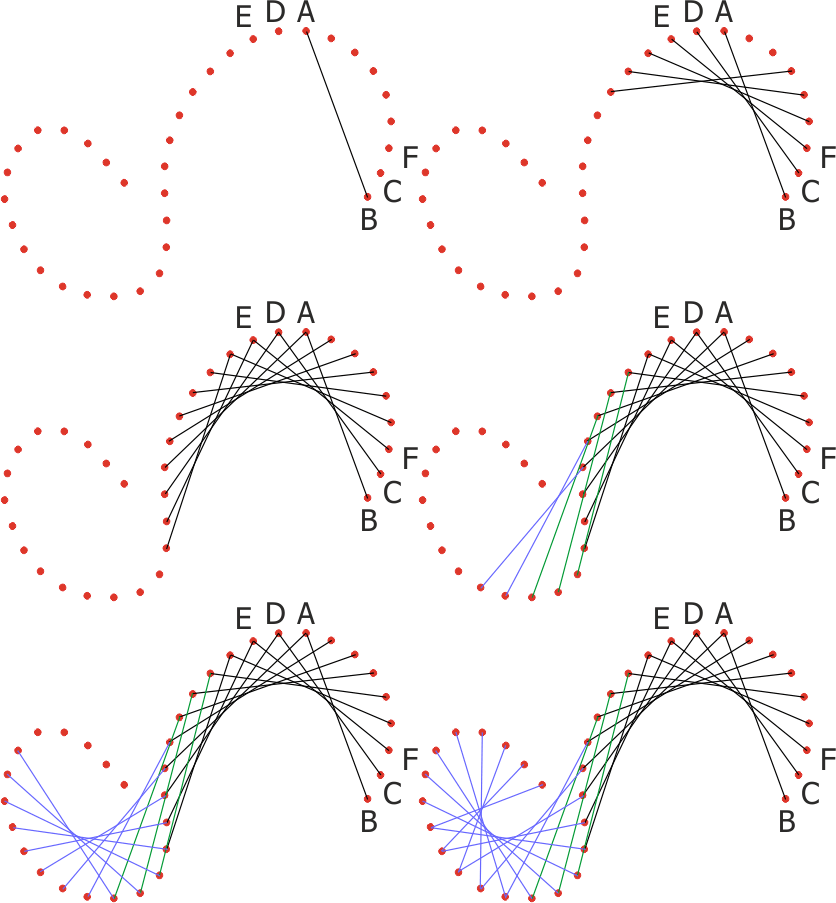
Continuing a sequence along an ‘S’ curve.
The following animated diagram is part of a flower shape. Although at a glance it may look difficult a methodical approach will work. Move forward one set of holes at a time. Keep the same number of holes between the hole you come out of and the hole you go in at. In this example all the stitches are 9 holes long. Many of the holes are used twice. Continue the stitching until the shape is completed.

Keep adding stitches until the shape is complete. Some of the stitches in the above diagram have been drawn in colour to make it easier to see where they are going.
Stitching a mirror image.
Sometimes the instructions say that a section is a mirror image of the previous one. This means that the image is reversed left to right. For example, when you look in the mirror the image is reversed. To test this hold up a printed sheet to your mirror. The stitching sequence is similar to the one it is being compared with but the stitches go in the opposite direction. Study the finished diagram to see how they go.
See our Useful Links page for equipment and materials suppliers.